Welders often talk about purging in welding in a way that makes it look like a sort of mystery. Yes, it does sound scary and gloomy and may conjure up visuals from horror films. However, the reality is that purging in welding is nothing but a simple process to improve weld quality.
So, what is purging in welding? It is an oxygen removal process that removes oxygen from the inside of a sealed component before welding. Thanks to the high temperature of the welding process, extracting oxygen from within the component protects the rear of the weld against oxidation. Here, we will discuss everything there is to know about purging in welding.
What is Purging in Welding?
The development of a perfect welding atmosphere is vital when welding titanium, stainless steel, and other materials that are resistant to corrosion. This is because the required corrosion resistance relies on it. The heated weld seam is subjected to air throughout the welding process, and it oxidizes if not secured. This oxidation has to either be avoided or eventually addressed. Effective welding partly relies on a combination of appropriate purging techniques and equipment.
A frequently asked question concerning purging is the rate of flow at which purging should be performed by a welder. The fact of the matter is that the flow is largely dependent upon the purging volume.
In the real world, the welder should aim for sufficient flow to slowly push out the oxygen and sustain a marginally higher force inside the purge chamber as opposed to outside it. This activity stops fresh oxygen from entering the purged region again while welding through the weld surface, thus reducing excess friction, which can lead to problems in the welding arc.
Another frequently asked question related to weld purging is the duration of purge time. In addition to practical experience in determining purging time, welders can utilize several methodologies that have been devised for determining the exact moment to weld.
Why is Purging Necessary in Welding?
Welding produces extreme heat, which provokes the metal to react with airborne oxygen. The subsequent oxidation causes the weld to appear poor and makes the weld softer than it should be. Welders channel an inert gas (helium, argon, or a combination of the two) over the weld to secure the weld at its warmest. The inert gas does not interfere with the weld and drives out oxygen from the weld direction.
Unprotected TIG welds look awful, with lots of cracks and spattering. Additionally, you will have a sizeable quantity of black gunk from oxidation on top of the bead. Unprotected welds are softer than they are supposed to be, and are subject to tearing and splitting (ultimately). As a result, in welding, shield gas plays a critical role.
Purging is a great option when welding copper, aluminum, steel, and other similar metals. However, it is not a very good option for stainless steel. This is because the chromium that is combined with the alloy can melt both the front side and the backside of the weld. If this occurs, the weld joint’s backside will darken and get coated with rugged specks. This effect is referred to as “sugaring” by welders.
What is the Process of Purging?
Purging is one of the things which every welder must learn. This is because when you purge a weld, you eliminate any gasses from the welding joint that may affect the weld whilst or immediately following the process, resulting in corrosion, discoloration, or oxidation. The purging process can be performed in the following ten steps.
Step 1—Gather the Items
This list of items that a successful purge weld requires is not that long. The items needed for purge weld comprise of the following: welding hat, welder, argon, saw purge plugs, and file. These materials will ensure the weld is tidy, attractive, and will pass the evaluation without any doubt.
Step 2—Before the Weld
Make sure to have a suitable cut in the pipe before welding. Also, make sure to read the specifications for cutting on the blueprint. Don’t ever try and assume about it. If the cut is poor, it will result in a poor fit-up, leading to a waste weld that will not meet standards. Ideally, you should abide by the rule: measure twice cut once. This will help to achieve a good cut and an excellent weld.
Step 3—File the Pipe
On the piping, it is very important to get a good weld and fit-up. This implies that the pipe needs to be secured. Minor burrs are left on the pipe from saw cutting. That needs to be signed off. Leaving it on the pipe will cause the weld to get infected, and the inspectors will force the welder to cut the weld out and work on it again, which is not pleasant. Additionally, the fit-up is improved by filling the pipe. This is because the little burrs and blemishes from the saw are rubbed off, making the surface clean and flawless, which in turn makes it very easy to fit up.
Step 4—Positioning Purge Plugs
In the pipe’s opposite side, purge plugs must be placed and tapped off to prevent them from falling out. Thick rubber pieces, purge plugs come with holes that permit a minimal amount of argon to leak out so that tension inside the pipe does not build up and cause the weld to burst out.
Step 5—Introducing Argon
To fill the pipe, argon must be introduced with the right flow. The pressure recommended is two pounds per square inch (psi). Since argon moves slowly, wait a second before the pipe can be welded. Generally, a good rule of thumb is waiting until the air pressure exits on the other side of the open hole.
Step 6—Fit-Up
Now that you’ve got argon moving via the pipes, fit them up. The fit-up is much more critical than the weld because if your fit-up is bad, you can expect to get a bad weld.
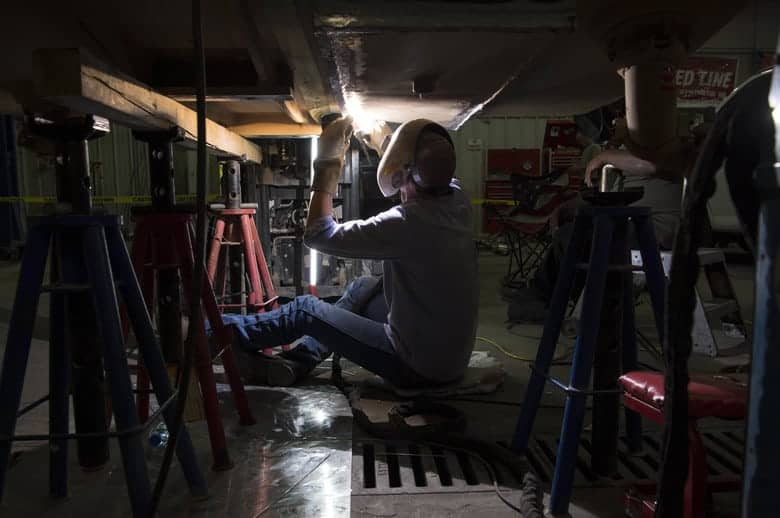
Step 7—Welding
Next comes the enjoyable part, which is to put in a fire weld. Welding is critical and you can choose either freehand the cup or walk it.
Step 8—Inspection
Take a step back and inspect the welded pipe. Welding inspection is needed because if there are defects that need to be corrected, then overlooking them could lead to welding failure, costing you both time and money.
Summary
We now know what purging in welding is, why it is necessary, how ultrasonic bonding works, and the process to perform it. With this information, you can find out if a purge weld is appropriate for your specific application and also how you can perform it efficiently to get the best results.
What Is Purge Welding Stainless Steel?
Thanks to its resistance to corrosion and ease of maintenance, Stainless steel is often specified for industrial, food processing, chemical, and pharmaceutical applications. As the heat tint or scale develops in melting, the weld metal is not secure and serves as a platform for pests to accumulate or oxidize to start to begin specific circumstances, it is crucial, in these kinds of applications, to prevent or eliminate this oxide heat tint.
In such situations, purge welding is especially useful if post-weld washing, such as inside tubes, is not feasible. Without any post-weld treatment, pure welding makes sure that the TIG weld’s root within a pipe or tube has a heat tint that is no greater than a light straw.
What Is Back Purging In Welding?
To explain it briefly, back purging in welding places the welded joint ahead of the argon to keep corrosion from the heated, reactionary weld on the side that cannot be protected with your torch. An example of this would be loading a pipe made from stainless steel with argon when welding the outer part to stop the weld bead’s inside part from “sugaring”.
Back purging in welding is performed to prevent contamination from the unwelded side of the root cycle. If access to the root is possible, then the weld designer can choose between grinding or root purging to extract the core and then reweld it from the side of the root. If access to the root of the weld, such as in a closely spaced tube, is not possible, then root purging is to be utilized. Root purging is primarily used in stainless steel. However, it can also be used in low-alloy steels and carbon, where the greatest consistency is required.